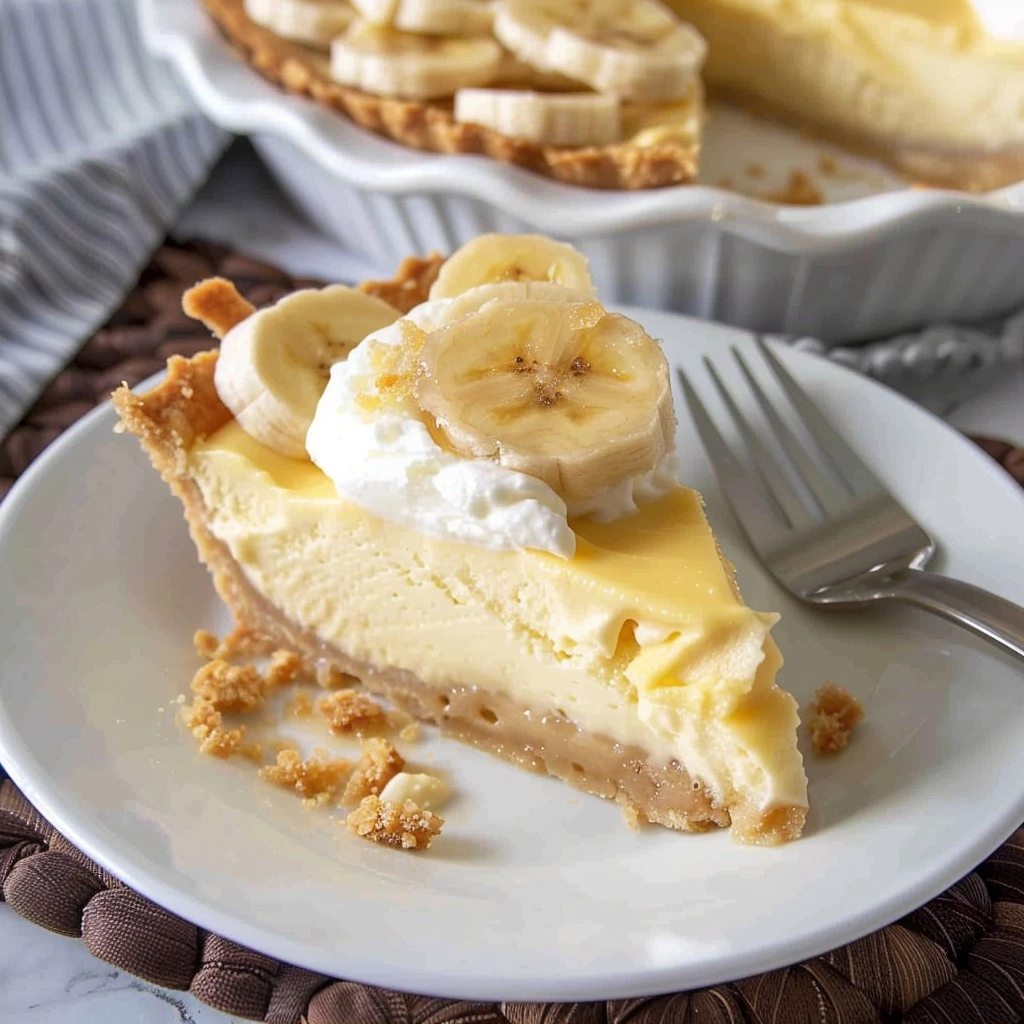
Icebox Banana Cream Pie is one of those recipes that feels like a gentle hug on a warm day. It’s pure comfort, straightforward, and comes together with such little fuss, it almost feels like magic. Imagine the sweet, tender slices of banana nestled in a creamy, dreamy vanilla pudding layer, all cradled by a buttery, crisp vanilla wafer crust – and the best part? You don’t even need to turn on your oven!
This no-bake marvel is perfect for when you’re craving something sweet but want to keep the kitchen cool and the effort low. It’s the kind of dessert that brings smiles to the table, shared with loved ones over a slice or two, evoking those wonderful kitchen memories. It’s about simple ingredients coming together to create something truly special, a testament to how delicious easy cooking can be.
What is Icebox Banana Cream Pie?
At its heart, an Icebox Banana Cream Pie is a chilled pie that relies on its refrigeration time to set, rather than baking. The term “icebox” itself evokes a charming sense of nostalgia, reminding us of simpler times when desserts were set in cool pantries or early refrigerators. It’s a delightful twist on the classic banana cream pie, making it more accessible and quicker to prepare, especially for those warmer months or busy weeknights.
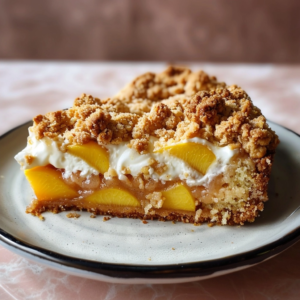
This rendition typically features a crushed cookie crust, often made with vanilla wafers or graham crackers, bound together with melted butter. The filling is a luscious blend of creamy vanilla pudding, often enhanced with whipped topping for extra lightness and body, and of course, plenty of fresh bananas. It’s the ultimate simple pleasure, capturing the essence of banana cream pie without the heat of the oven.
Reasons to Try Icebox Banana Cream Pie
There are so many wonderful reasons to bring this Icebox Banana Cream Pie into your kitchen. For starters, its “no-bake” nature is a game-changer. It means you can whip up a stunning dessert without adding extra heat to your home, making it an absolute lifesaver during summer gatherings or when you simply want to relax. The prep time is incredibly short, leaving you with more time to enjoy the company of your guests or simply unwind.
Beyond the ease, the taste and texture are simply divine. The smooth, cool filling paired with the tender bananas and crunchy crust creates a delightful contrast that’s incredibly satisfying. It’s perfect for both novice bakers taking their first steps and seasoned home cooks looking for a reliable, crowd-pleasing dessert that always tastes like a homemade treat. Families adore it, and it’s a fantastic option for potlucks or when you need a dessert in a hurry.
Ingredients Needed to Make Icebox Banana Cream Pie
Gathering your ingredients is half the fun, and for this pie, it’s refreshingly simple! Here’s what you’ll need to create this no-bake delight:
-
1 (3.4 ounce) box vanilla instant pudding mix
-
2 cups milk (2% milk works beautifully for a rich texture)
-
1 cup whipped topping (like Cool Whip, thawed)
-
4 ripe bananas (the ones with a few brown spots are perfect for sweetness)
-
For the Crust:
-
2.5 cups vanilla wafer cookie crumbs (about 45-50 cookies)
-
1 stick (1/2 cup) unsalted butter, melted
-
1/8 teaspoon salt
Instructions to Make Icebox Banana Cream Pie – Step by Step
Let’s bring this delightful Icebox Banana Cream Pie to life, step by simple step. You’ll be amazed at how quickly this comes together, leaving you more time to anticipate that first delicious bite.
Step 1: Crafting the Dreamy Crust
First things first, let’s get that delightful crust ready. Take your vanilla wafer cookies and place them into a food processor or a sturdy zip-top bag. Pulse or crush them until you have fine, sandy crumbs – think of the texture of wet sand. In a medium bowl, combine these cookie crumbs with the melted butter and the pinch of salt. Stir everything together with a fork until the crumbs are evenly moistened; they should hold their shape loosely when squeezed.
Now, gently press this buttery crumb mixture into the bottom and up the sides of a 9-inch shallow pie pan. Use the bottom of a glass or your fingers to pack it down firmly and evenly. This ensures your crust will hold its shape and provide that satisfying crunch with every slice. Don’t worry about greasing the pan; the butter in the crust does all the work, creating a wonderfully tender base.
Step 2: Whisking Up the Creamy Filling
Next, let’s create that luscious banana-vanilla filling. In a separate medium bowl, pour in the milk. Sprinkle the contents of the vanilla instant pudding mix over the milk. Grab a whisk and begin mixing vigorously until there are no lumps and the mixture is smooth and begins to thicken. This usually takes just a couple of minutes; you’ll notice it transforming into a lovely, creamy consistency right before your eyes.
In another small bowl, take two of your ripe bananas and mash them thoroughly with a fork until they are smooth and almost pureed. This will help distribute their sweet flavor and soft texture throughout the pudding. Gently fold this mashed banana mixture into the thickened vanilla pudding until it’s well combined. Now, add the thawed whipped topping to the pudding mixture. Use a spatula to gently fold it in until everything is incorporated and you have a light, airy, and creamy filling.
Step 3: Assembling and Chilling for Perfection
It’s time to bring all the elements together! Take your remaining two ripe bananas and slice them into even rounds. Arrange these banana slices in a single, attractive layer on top of the prepared vanilla wafer crust. Try to distribute them evenly across the bottom of the pie shell. Once the bananas are in place, carefully pour the creamy banana pudding mixture over the top, spreading it gently with your spatula to cover the bananas completely and create a smooth surface.
Now for the magic of the icebox! Cover the pie securely with plastic wrap or aluminum foil, making sure it’s well-sealed to prevent any freezer odors from affecting the flavor. Place the pie in the freezer and let it chill and set for a minimum of 6 to 8 hours. This lengthy chill time is crucial; it allows the filling to firm up beautifully, ensuring clean slices and that wonderful, cold, refreshing dessert experience. The longer it chills, the firmer it will be.
Step 4: The Grand Reveal and Serving
The most anticipated step! Once the pie has had ample time to freeze and set, carefully remove it from the freezer. Before serving, allow the Icebox Banana Cream Pie to thaw at room temperature for about 15 to 20 minutes. This brief thawing period softens the filling just enough to make it easy to slice while still keeping it wonderfully cold and refreshing. If you’d like an extra touch of sweetness and visual appeal, top your slices with swirls of extra whipped topping and a sprinkle of crushed vanilla wafers or cookies.
Chef’s Tips for a Perfect Result
-
Choose the Right Bananas: Opt for bananas that are slightly overripe, with plenty of brown spots. They are naturally sweeter and have a softer texture that mashes easily.
-
Don’t Over-Mix Pudding: Whisk the pudding and milk until just combined and thickened to prevent a gummy texture. Over-whipping can sometimes make instant pudding too stiff.
-
Gentle Folding is Key: When incorporating the whipped topping and mashed bananas into the pudding, fold gently to maintain the airy lightness of the filling.
-
Chill Time is Crucial: Ensure the pie freezes for the full 6-8 hours. This is what allows the pie to set properly without baking, yielding that signature icebox texture.
-
Room Temperature Thaw: The 15-20 minute thaw is essential for a pleasant slicing experience and perfect texture – too frozen and it’s hard to cut; too thawed and it becomes messy.
-
Crust Consistency: Make sure your cookie crumbs are fine enough and well-moistened with butter. This prevents a crumbly crust after freezing.
Variations and Substitutions
While this Icebox Banana Cream Pie is wonderfully classic, it’s also a fantastic base for your own creative touches!
-
Gluten-Free Alternative: Use gluten-free vanilla wafers or graham crackers for the crust. Ensure your pudding mix is also certified gluten-free. The texture will remain similar, offering a delightful treat for those with gluten sensitivities.
-
Vegan Option: To make this pie vegan, use dairy-free milk (like almond or soy milk) and a vegan vanilla pudding mix. For the whipped topping, opt for a dairy-free whipped topping. Ensure your vanilla wafer cookies are also vegan. This substitution will yield a creamy, plant-based dessert that’s just as delicious.
-
Cookie Crust Swap: Instead of vanilla wafers, try using graham crackers or shortbread cookies for the crust. Graham crackers add a honey-like sweetness, while shortbread offers a richer, buttery flavor. You can also make a chocolate cookie crust for a delightful flavor contrast.
-
Flavor Boosts: Stir in a teaspoon of vanilla extract along with the pudding mix for an extra layer of vanilla flavor. A pinch of cinnamon in the crust also adds a warm, subtle spice.
-
Banana Ripeness: If you only have less ripe bananas, you can mash them and briefly sauté them with a touch of sugar and cinnamon to soften them and enhance their sweetness before adding to the pudding.
How to Serve and Pair
Serving this Icebox Banana Cream Pie is always a joyous occasion. For a beautiful presentation, a dollop of extra whipped topping right in the center or piped around the edges adds a lovely flourish. A sprinkle of crushed vanilla wafers, finely chopped nuts like toasted pecans, or even a few thin slices of fresh banana can elevate its look. For a bit of elegance, a light dusting of cocoa powder or shaved chocolate can be delightful.
This pie pairs wonderfully with a scoop of vanilla ice cream, offering a delightful temperature contrast. A warm cup of coffee or a glass of cold milk are classic beverage pairings that everyone enjoys. It’s perfect for family dinners, casual get-togethers, holiday celebrations, or simply as a comforting treat after a long day. Its charm lies in its versatility, fitting seamlessly into any gathering where sweet moments are shared.
Storage and Reheating
Refrigerator
Leftover Icebox Banana Cream Pie should be stored in the refrigerator. Keep it well-covered with plastic wrap or an airtight container to prevent it from drying out or absorbing odors. It will stay delightfully fresh and maintain its best texture in the fridge for up to 3 days. Remember that the crust may soften slightly over time.
Freezer
While this pie is designed to be frozen for setting, storing leftovers in the freezer is not ideal for maintaining its best texture. The filling may become too hard, and the crust can become soggy or freezer-burnt if not perfectly sealed. If you must freeze leftovers, ensure it’s in a truly airtight container and consume within 1-2 weeks for optimal quality.
Room Temperature
This pie is best served chilled and should not be left at room temperature for more than 2 hours. Due to the fresh fruit and dairy components, leaving it out for extended periods can affect its texture and safety.
Reheating
Reheating is generally not recommended or necessary for this chilled dessert. The beauty of this Icebox Banana Cream Pie is its refreshing, cold state. If it has become too hard to slice after being frozen, simply allow it to sit at room temperature for the recommended 15-20 minutes before serving. Adding moisture or heat would change its intended delicious cold texture.
Frequently Asked Questions (FAQ)
Can I use fresh pudding instead of instant for my Icebox Banana Cream Pie?
No, this recipe specifically calls for instant vanilla pudding mix because its setting agents are designed to thicken without cooking, which is essential for a no-bake pie. Using cooked pudding would result in a filling that doesn’t set properly in the freezer.
How do I know when my Icebox Banana Cream Pie is ready to serve after freezing?
Your pie is ready to serve when it has chilled for at least 6-8 hours and is firm to the touch. It should hold its shape when sliced. Allow it to thaw for 15-20 minutes at room temperature before cutting to achieve the perfect creamy texture.
My crust feels crumbly after freezing, what went wrong with my Icebox Banana Cream Pie?
A crumbly crust often happens if the cookie crumbs weren’t moistened enough with butter or weren’t pressed firmly enough into the pan. Ensure you use enough melted butter for the amount of crumbs and pack it down tightly to create a cohesive base.
Can I make the Icebox Banana Cream Pie crust and filling ahead of time?
You can prepare the crust a day in advance and store it, covered, at room temperature. The pudding filling can be made a few hours ahead and kept refrigerated, but it’s best to assemble the pie within a few hours of when you plan to freeze it to ensure freshness of the bananas.
What’s the best way to customize or serve my Icebox Banana Cream Pie?
Customization is easy! Top with fresh whipped cream, chocolate shavings, or chopped toasted nuts for added texture and flavor. You can also experiment with different cookie crusts like graham crackers or chocolate cookies. Serve chilled slices with a glass of cold milk for a classic pairing.
CONCLUSION
This Icebox Banana Cream Pie is a simple, yet utterly delightful, no-bake dessert that brings pure joy with every creamy bite. It’s an effortless way to impress friends and family, offering a taste of homemade goodness with minimal effort. The irresistible combination of sweet bananas, smooth vanilla cream, and a crisp, buttery crust makes this a dream dessert you’ll want to make again and again.
Print
Icebox Banana Cream Pie: An Effortless No-Bake Dream
- Prep Time: 20
- Total Time: 20
- Yield: 8 slices 1x
- Category: desserts
- Method: Refrigeration
- Cuisine: American
- Diet: Dairy-Free Alternative
Description
A no-bake, chilled banana cream pie with a buttery vanilla wafer crust, creamy homemade pudding, and fresh bananas. This nostalgic dessert combines a crisp base, dreamy filling, and soft fruit for a refreshing summer treat.
Ingredients
24 vanilla wafers (or 1 ½ cups crushed wafers)
1/2 cup butter, softened
4 cups whole milk
1 ½ cups granulated sugar
6 egg yolks
2 tbsp pure vanilla extract
1/4 tsp salt
3 ripe bananas, sliced and halved
1 cup heavy cream
2 tbsp powdered sugar
1/2 tsp non-alcoholic vanilla extract (optional)
Instructions
Combine crushed vanilla wafers and softened butter to form crust.
Press crust firmly into a greased 9-inch springform pan.
In a bowl, whisk egg yolks, sugar, and salt; stir in milk and vanilla extract.
Chill pudding mixture for 1 hour until thickened.
Layer sliced bananas over the crust.
Fold whipped cream (heavy cream, powdered sugar, and vanilla) into the pudding.
Pour pudding mixture over bananas and press the lid firmly on the pan.
Chill for at least 4 hours before slicing.
Notes
Use ripe bananas for maximum sweetness and moisture.
Chill thoroughly for optimal texture.
Wrap leftovers tightly in plastic wrap to prevent browning.
Non-alcoholic vanilla extract can substitute for traditional extract if desired.
Crust can be made with graham crackers for a crisper base.
Nutrition
- Serving Size: 1 slice
- Calories: 480
- Sugar: 50g
- Sodium: 100mg
- Fat: 22g
- Saturated Fat: 13g
- Carbohydrates: 65g
- Fiber: 2g
- Protein: 10g
- Cholesterol: 85mg