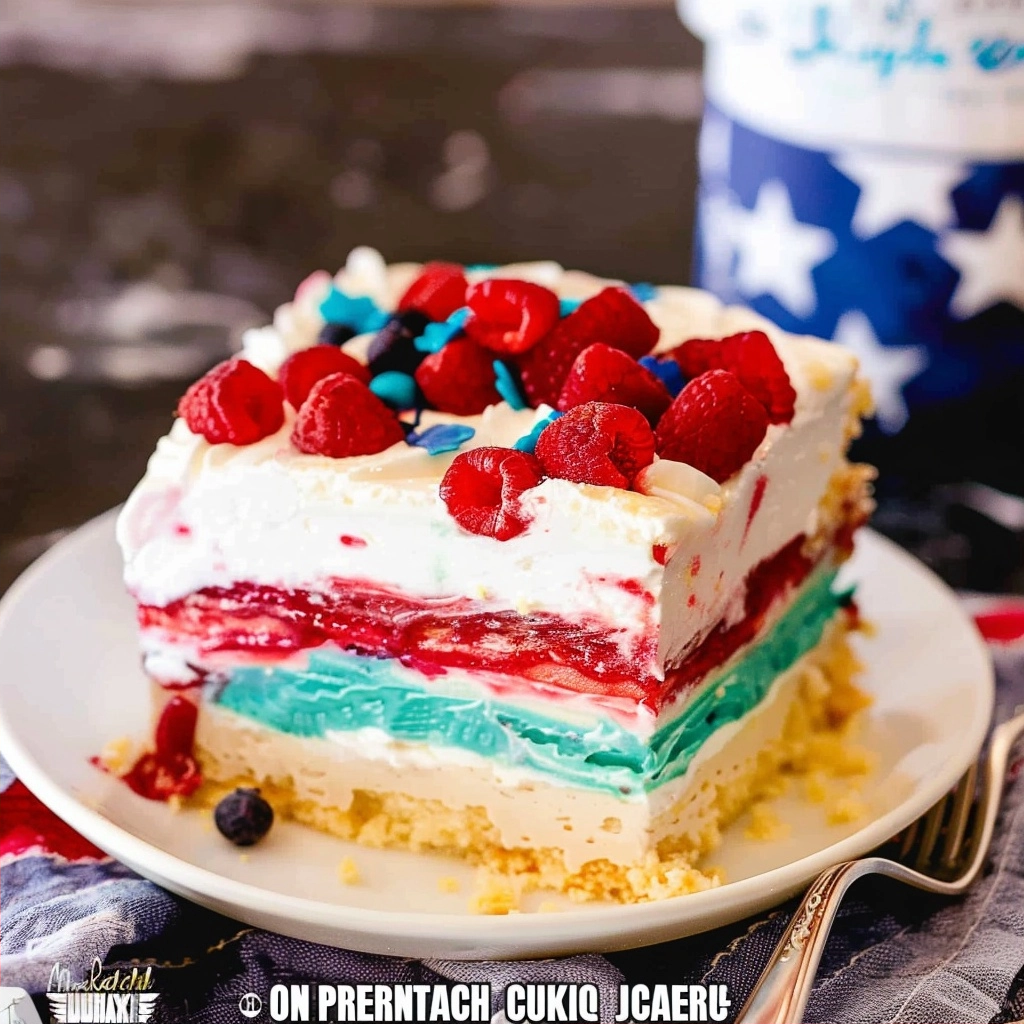
No Bake Berry Lush is the perfect creamy treat to bring to your next family gathering or summer potluck. With its layers of buttery vanilla cookie crust, vibrant fruit-flavored gelatin, and a silky smooth cream cheese topping, this dessert is truly a crowd-pleaser that comes together without ever turning on the oven.
Whether you are hosting a festive celebration or simply looking for a sweet escape, this No Bake Berry Lush offers a beautiful presentation that tastes just as good as it looks. The combination of textures is what makes it so special, moving from a crisp, sweet base to a soft, melt-in-your-mouth filling that feels incredibly indulgent.
What is No Bake Berry Lush?
No Bake Berry Lush is a classic layered dessert that relies on the magic of chilling rather than baking to set its structure. It is inspired by traditional icebox cakes and layered puddings, featuring a foundation of crushed vanilla cookies bound together by butter to create a sturdy, flavorful base.
What makes this dessert unique is the playful use of gelatin mixed with instant pudding to create colorful, fruit-forward layers. By splitting the batches into cherry and blue raspberry, you get a beautiful red and blue aesthetic that is visually stunning. The top layer of fluffy whipped cream adds a final touch of cloud-like decadence that perfectly balances the fruitiness below.
Reasons to Try No Bake Berry Lush
You should try this recipe because it is incredibly beginner-friendly and requires absolutely no heat, making it the perfect choice for busy days or hot summer afternoons. It is a fantastic “make-ahead” dessert, meaning you can prepare it well before your guests arrive and let the refrigerator do all the heavy lifting.
This dessert is also highly versatile, serving as a clean canvas for your favorite garnishes. It is an ideal project for getting kids involved in the kitchen, especially during the assembly phase where they can help sprinkle the festive toppings. The balance of creamy, fruity, and crunchy notes ensures that every bite feels like a celebratory treat.
Ingredients Needed to Make No Bake Berry Lush
-
36 vanilla Oreo cookies (crushed finely in a food processor)
-
6 tablespoons unsalted butter (melted to bind the crust)
-
3 ounces cherry gelatin (for the vibrant red layer)
-
3 ounces blue raspberry gelatin (for the striking blue layer)
-
2/3 cup boiling water (divided for the gelatin mixtures)
-
6.8 ounces vanilla instant pudding (two small boxes)
-
2 1/2 cups cold milk (whisk until smooth and thick)
-
8 ounces cream cheese (softened to room temperature for easier mixing)
-
1 cup powdered sugar (adds sweetness to the cream layer)
-
16 ounces whipped topping (thawed completely for folding)
-
Red, white, and blue sprinkles (for a fun, patriotic garnish)
Instructions to Make No Bake Berry Lush – Step by Step
Step 1: Begin by preparing your crust. Place the vanilla Oreo cookies into your food processor and pulse until they form fine, uniform crumbs. Transfer these crumbs into a mixing bowl, pour in the melted butter, and stir until the mixture resembles wet sand. Firmly press the mixture into the bottom of a 9×13 glass baking dish to create an even, compact base.
Step 2: In two separate small bowls, prepare your colorful layers. Combine the cherry gelatin with one-third cup of boiling water in the first bowl, whisking until the powder is fully dissolved. Repeat this exact process in the second bowl with the blue raspberry gelatin. Let these sit briefly while you move on to the pudding mixture.
Step 3: In a medium bowl, whisk the dry vanilla pudding mixes with the cold milk until the mixture is thick and smooth. Once ready, divide this mixture in half. Carefully whisk one half of the pudding into the cherry gelatin bowl and the other half into the blue gelatin bowl. The result should be two distinctively colored, creamy fruit mixtures.
Step 4: Now for the creamy layer. In a large bowl, use an electric mixer to combine the softened cream cheese and powdered sugar until the texture is perfectly smooth and free of lumps. Gently fold in one container of the whipped topping until combined, then spread this mixture evenly over your chilled cookie crust.
Step 5: Assemble your layers with care. Spoon the red gelatin mixture over the cream cheese layer, spreading it gently to the edges. Follow this by spooning the blue gelatin mixture on top of the red layer, taking your time to ensure the colors stay separate. Top the entire dessert with the remaining whipped topping and garnish with your colorful sprinkles. Refrigerate for at least four hours before serving to ensure everything is set and ready to slice.
Chef’s Tips for a Perfect Result
-
Ensure your cream cheese is at true room temperature so you get a silky, lump-free filling every time.
-
When spreading the gelatin layers, use the back of a spoon to gently nudge the mixture to the edges rather than dragging it to avoid muddied colors.
-
Let the gelatin mixture cool slightly before folding in the pudding to prevent the whipped topping from melting or losing its structure.
-
If you want cleaner slices, run a sharp knife under hot water and wipe it dry between every cut.
Variations and Substitutions
-
Gluten-Free Alternative: Swap the vanilla Oreos for gluten-free sandwich cookies to keep the flavor profile intact.
-
Low-Sugar Version: Use sugar-free gelatin, sugar-free pudding mix, and a powdered sugar substitute to lower the overall sugar content.
-
Fruit Swap: If you prefer different flavors, try using lime or lemon gelatin to create a vibrant green or yellow layered effect.
-
Budget Swap: Store-brand sandwich cookies work just as well as name-brand versions for the crust.
How to Serve and Pair
Serve this lush chilled, straight from the refrigerator for the best texture. It pairs beautifully with a glass of cold iced tea or a light sparkling lemonade. For a special touch, serve individual slices with a few fresh berries on the side to highlight the fruit flavors hidden within the layers.
Storage and Reheating
Refrigerator
Keep your No Bake Berry Lush covered tightly with plastic wrap or in an airtight container for up to three days. The crust may soften slightly over time, but the flavor remains excellent.
Freezer
While this dish is best fresh, you can freeze it for up to two weeks. Wrap it securely to prevent freezer burn and thaw it in the refrigerator overnight before serving.
Reheating
Do not reheat this dessert. It is specifically designed to be served cold, and warming it would cause the gelatin and whipped cream to melt into a liquid consistency.
Frequently Asked Questions (FAQ)
Can I substitute the vanilla Oreos?
Yes, you can use any plain vanilla sandwich cookie or even graham crackers if you prefer a different crunch.
How do I know when the dessert is set?
The dessert is properly set when the top is firm to the touch and the gelatin layers have stabilized after the full four-hour refrigeration time.
Why is my cream cheese layer lumpy?
Your cream cheese was likely too cold during the mixing process; always ensure it sits on the counter for at least 30 minutes before starting.
Can I make this the day before?
This recipe is actually better when made a day in advance, as it allows the crust to firm up and the flavors to meld together perfectly.
How can I customize the presentation?
You can top the lush with fresh blueberries and raspberries or even a light dusting of white chocolate shavings to elevate the look for special occasions.
Conclusion
No Bake Berry Lush is a delightful, colorful treat that brings a touch of joy to any table without the stress of baking. Whether it is a sunny picnic or a casual weekend gathering, this recipe provides a refreshing, creamy experience that everyone will love. Give it a try this weekend and enjoy the bright, fruity layers of this simple and irresistible dessert.
Print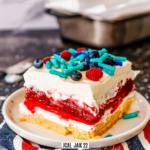
No Bake Berry Lush
- Prep Time: 30
- Total Time: 270
- Yield: 15 servings 1x
- Category: desserts
- Method: No-bake
- Cuisine: American
- Diet: Vegetarian
Description
No Bake Berry Lush is the perfect creamy treat to bring to your next family gathering or summer potluck. With its layers of buttery vanilla cookie crust, vibrant fruit-flavored gelatin, and a silky smooth cream cheese topping, this dessert is truly a crowd-pleaser that comes together without ever turning on the oven. It offers a beautiful presentation with a balance of crisp, sweet, and soft textures that feel incredibly indulgent.
Ingredients
36 vanilla Oreo cookies, crushed finely
6 tablespoons unsalted butter, melted
3 ounces cherry gelatin
3 ounces blue raspberry gelatin
2/3 cup boiling water, divided
6.8 ounces vanilla instant pudding
2 1/2 cups cold milk
8 ounces cream cheese, softened
1 cup powdered sugar
16 ounces whipped topping, thawed
Red, white, and blue sprinkles for garnish
Instructions
Mix crushed vanilla cookies with melted butter and press firmly into the bottom of a 9×13 inch pan. Refrigerate to set.
Dissolve cherry gelatin in 1/3 cup boiling water and blue raspberry gelatin in 1/3 cup boiling water in separate bowls; set aside to cool.
Whisk instant pudding with cold milk until thickened.
In a large bowl, beat softened cream cheese with powdered sugar until smooth; fold in half of the whipped topping.
Spread half of the cream cheese mixture over the crust.
Swirl the cooled cherry and blue raspberry gelatin mixtures into the remaining cream cheese mixture and spread over the first layer.
Top with the remaining whipped topping and garnish with festive sprinkles.
Refrigerate for at least 4 hours before serving.
Notes
Ensure the cream cheese is fully softened to room temperature to avoid lumps. For a cleaner slice, chill the dessert thoroughly before serving. Keep refrigerated until ready to eat.
Nutrition
- Serving Size: 1 slice
- Calories: 320
- Sugar: 28g
- Sodium: 210mg
- Fat: 14g
- Saturated Fat: 8g
- Carbohydrates: 42g
- Fiber: 0g
- Protein: 3g
- Cholesterol: 35mg